A Comprehensive Guide to Reading a Tape Measure: What You Need to Know
Reading a tape measure is an essential skill for anyone who regularly works with tools and materials. Whether you’re a carpenter, mechanic, electrician, or DIY enthusiast, you’ll likely find yourself needing to read a tape measure at some point. Understanding how to read a tape measure accurately is a fundamental part of ensuring that your projects are successful and safely completed.
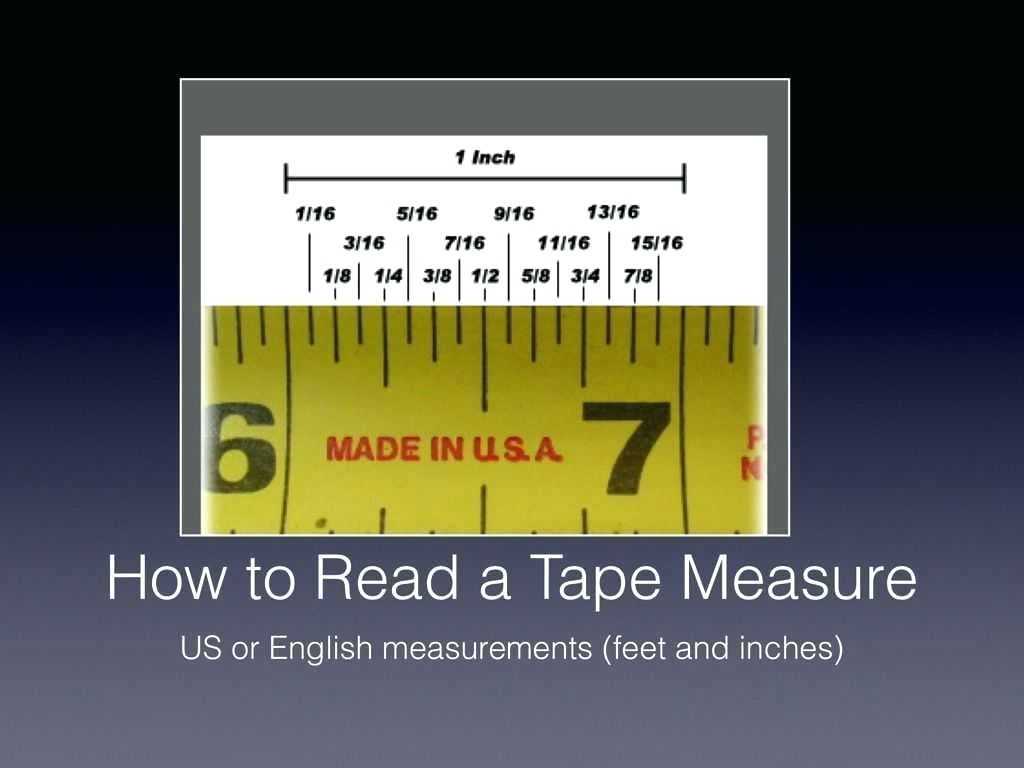
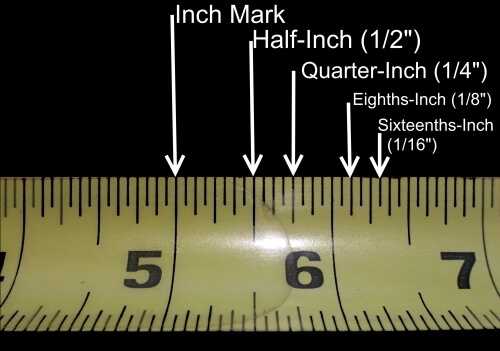
To begin reading a tape measure, it is important to know the basic layout of the tool. The tape measure consists of a metal blade, which is the main component of the device, and a housing that stores and protects the blade when not in use. Along the blade, you’ll find a series of lines and numbers. These lines and numbers represent fractions of an inch as well as inches and feet.
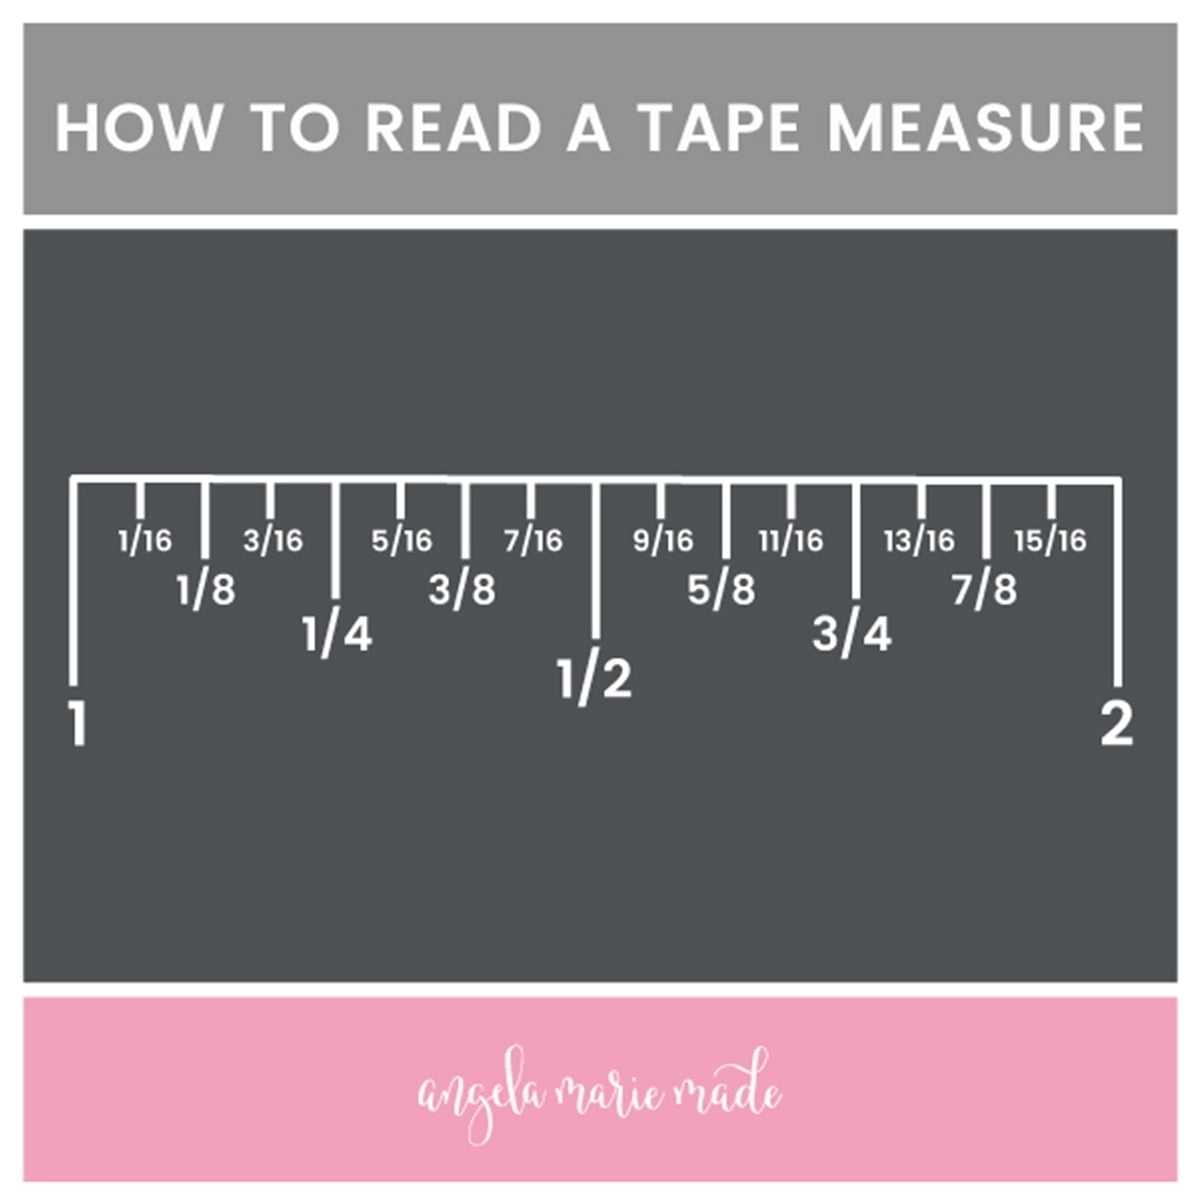
When reading a tape measure, it’s important to identify what each of the lines and numbers represent. The smallest lines indicate fractions of an inch such as 1/16th, 1/8th, 3/16th, and so on. The larger numbers are used to indicate inches and feet. For example, the number 2 could indicate two inches or two feet, depending on what part of the tape measure you are looking at.
[toc]
When reading a tape measure, it’s important to understand how to read from the left and from the right. When you’re looking at the blade from left to right, the numbers will represent inches, while the numbers on the right side of the blade represent feet. To make things easier, many tape measures will have a red inch-marker on the left side, and a black foot-marker on the right side.
It’s also important to understand how to read the fractions of an inch. As previously mentioned, the smallest lines on the blade will represent fractions of an inch. To read these, you’ll need to count how many lines there are between the larger inch-markers. For example, if there are three lines between the inch-markers, then the measurement would be 3/16th of an inch.
Finally, when utilizing a tape measure, it’s important to remember to always read the blade from the end of the blade, not the center. This will ensure that you’re getting the most accurate measurements.
By following these simple steps, you’ll be able to read a tape measure accurately and safely every time. With practice, you’ll soon become a master at reading a tape measure and have the confidence to tackle any project that requires accurate measurements.
Step-by-Step Instructions for Using a Reading a Tape Measure Worksheet
Step 1: Gather the necessary materials. To complete a reading a tape measure worksheet, you will need a tape measure, a pencil and a paper.
Step 2: Read the directions on the worksheet. The worksheet likely includes directions on how to complete the task. Carefully read and understand the instructions before continuing.
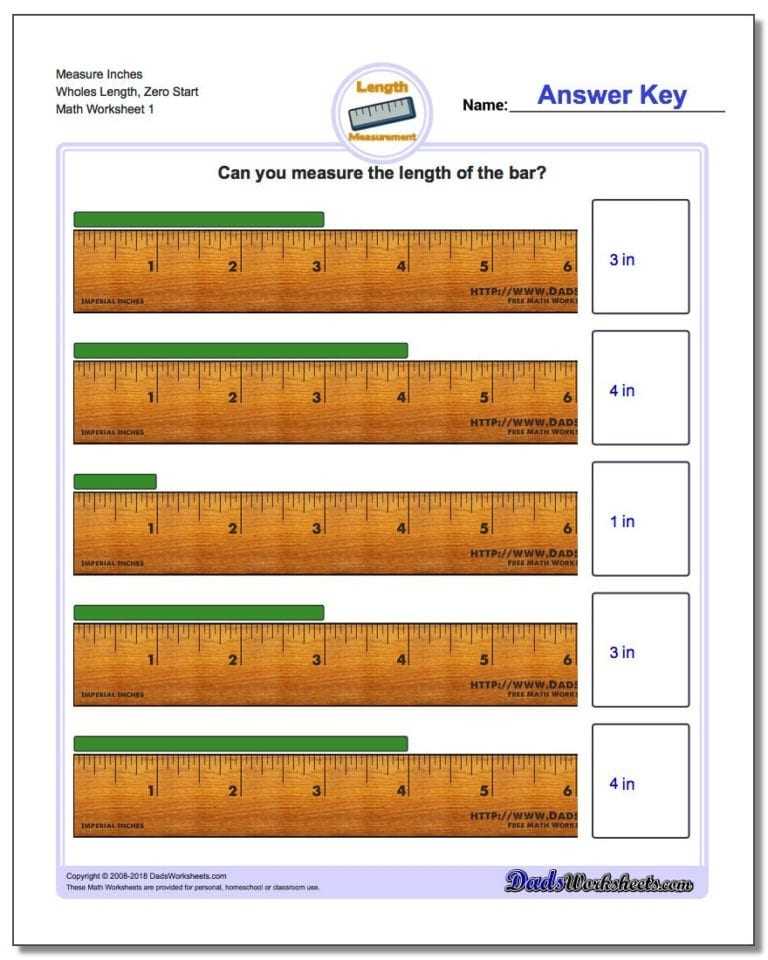
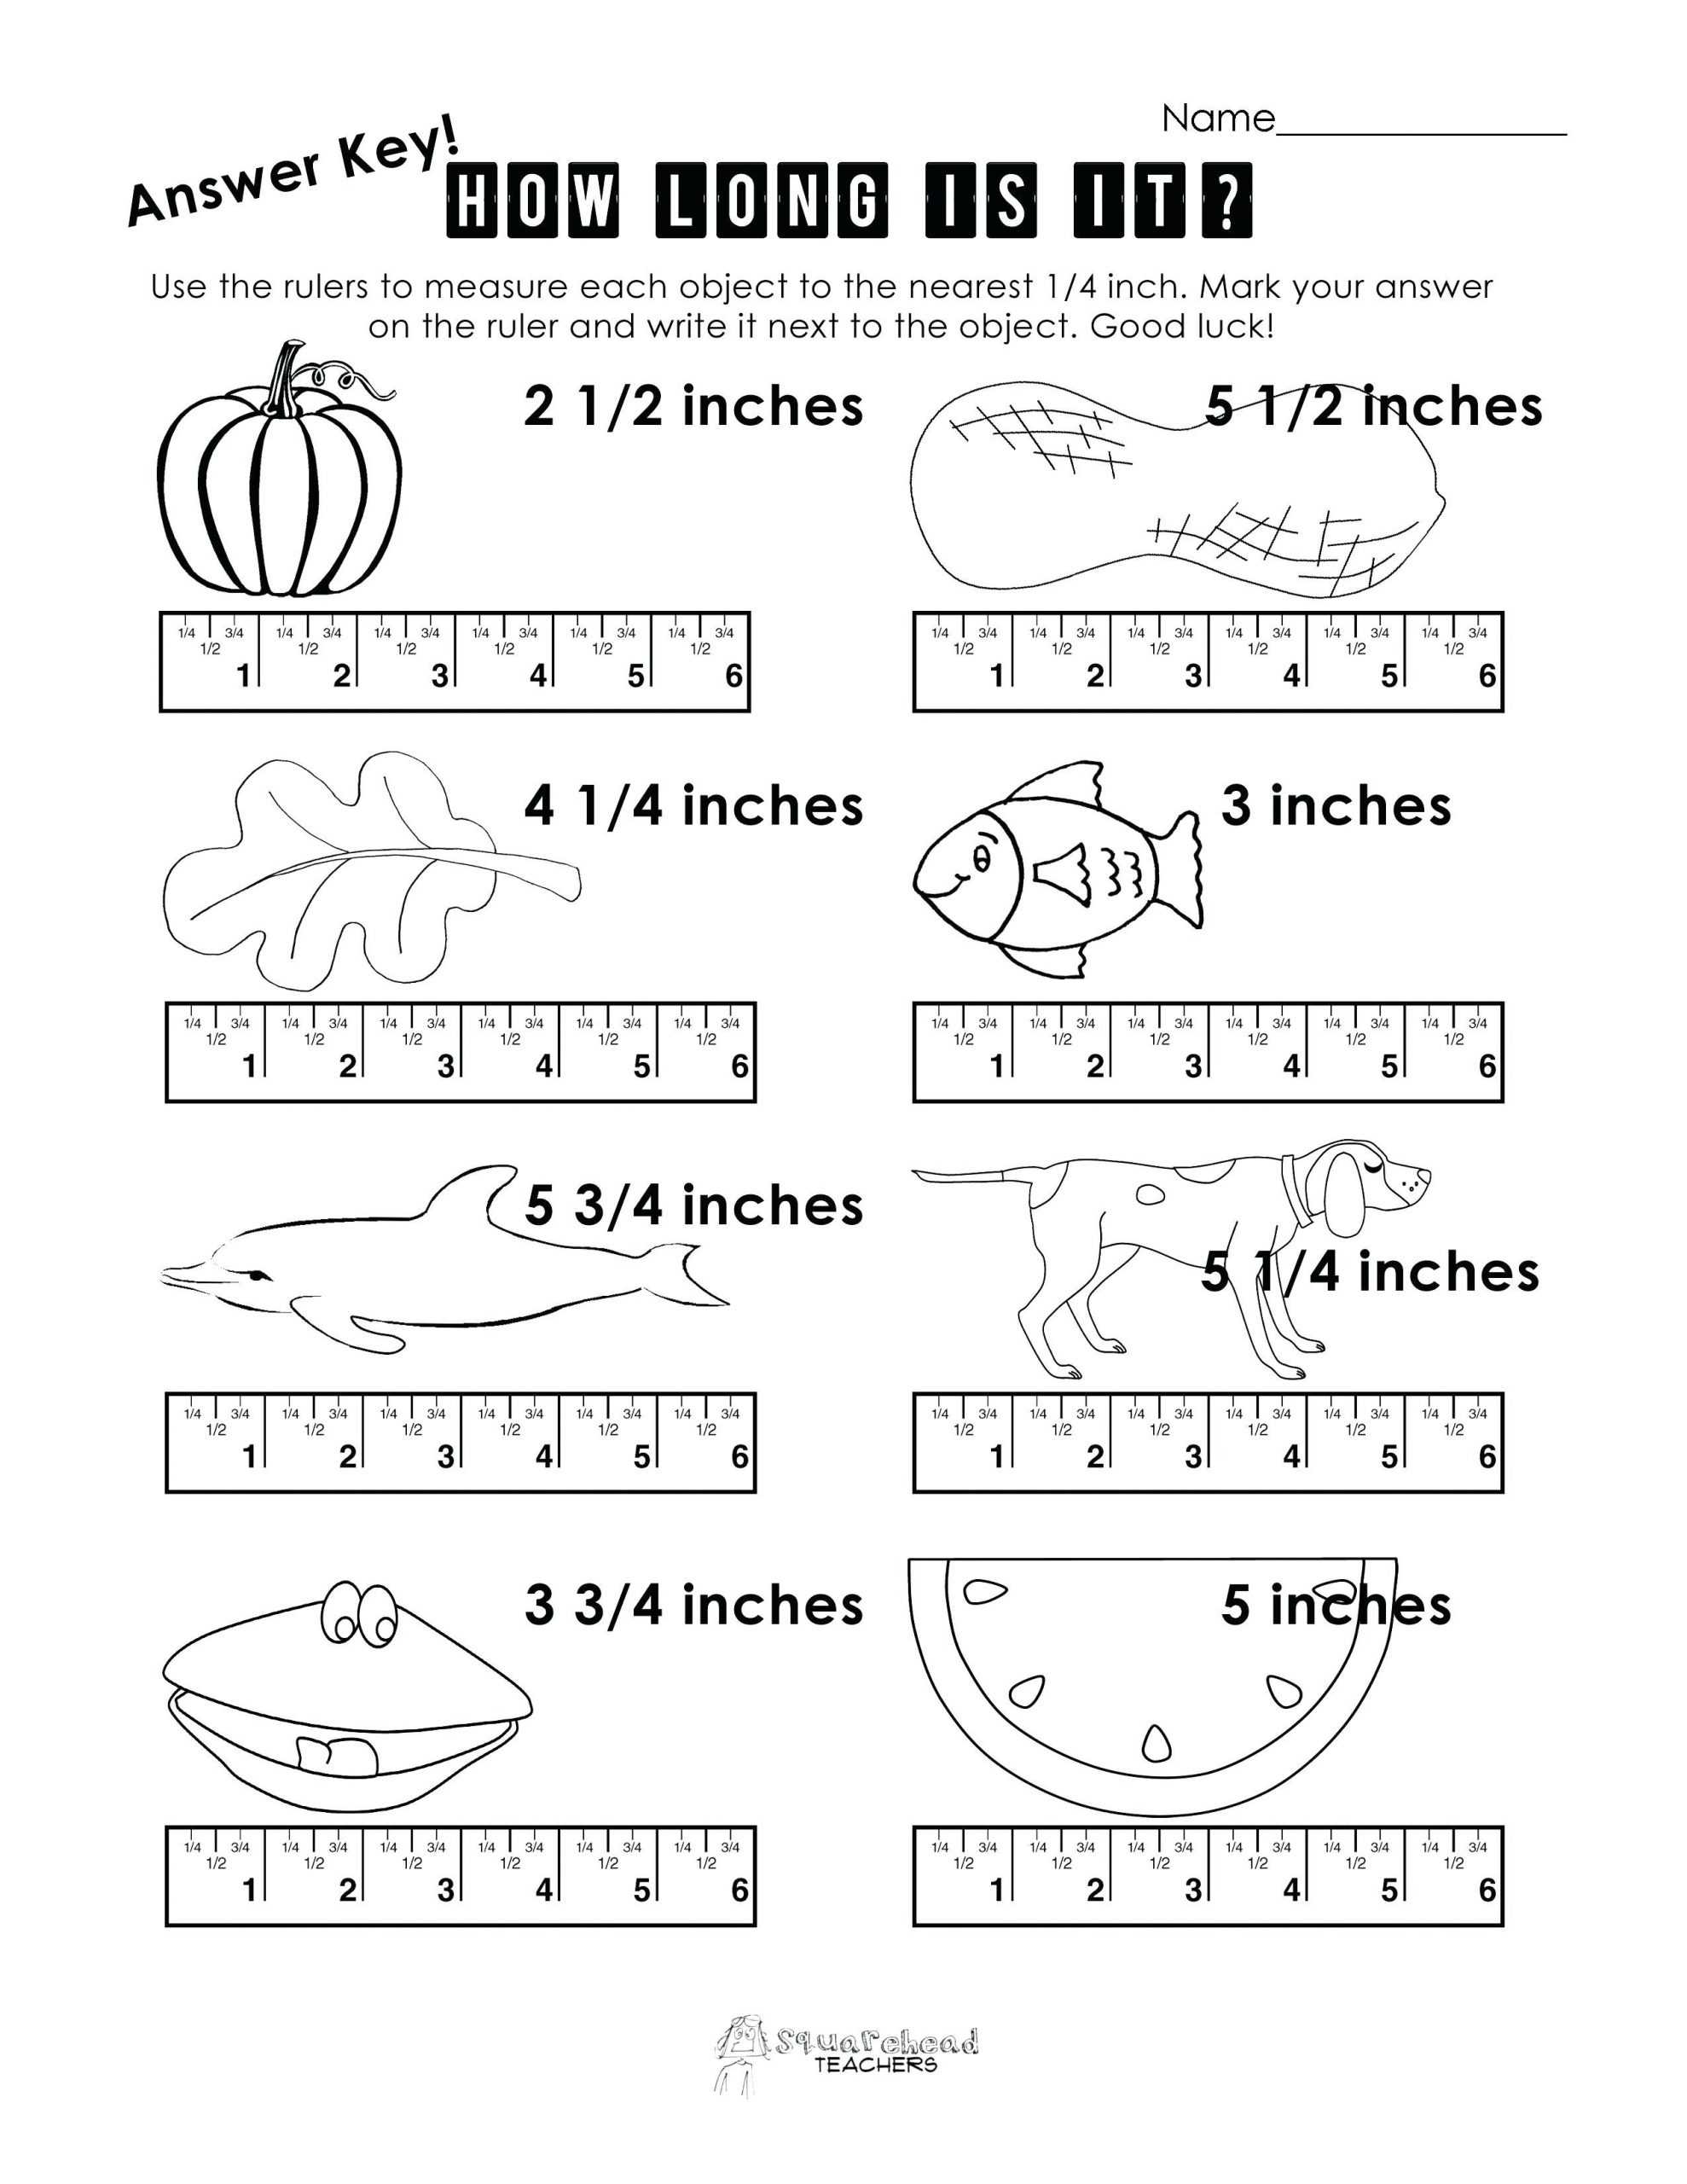
Step 3: Measure the given objects. Using the tape measure, measure the objects that are listed on the worksheet. Take note of the measurements, writing them down on the paper next to the given object.
Step 4: Record the measurements. Once you have taken the measurements of each object, write down the measurement on the worksheet in the designated column.
Step 5: Check your work. Once you have completed the worksheet, go back and double check your work to ensure accuracy.
Step 6: Submit the worksheet. If required, submit the worksheet when complete.
How to Use a Reading a Tape Measure Worksheet to Accurately Measure Objects
Using a reading a tape measure worksheet is a useful way to accurately measure objects. To do this, there are a few simple steps to follow.
First, make sure to double-check the markings on the tape measure to ensure accuracy. On the worksheet, there are different measurements, typically in increments of 1/16 inches. Make sure to become familiar with these measurements so that you can accurately read the tape measure.
Next, place the end of the tape measure at the starting point of the object you are measuring. Make sure the metal tab is firmly seated against the surface of the object, then pull the tape measure to the end point. Read the measurement on the tape measure and record it on the worksheet.
Once you have the measurement, you can use the worksheet to convert it into other units of measurement. For example, you can use the worksheet to convert inches to centimeters or centimeters to millimeters.
Finally, when you have all the measurements recorded on the worksheet, you can add them together to get the total length of the object. This is useful when measuring irregularly shaped objects or objects with multiple parts.
By following these steps and using a reading a tape measure worksheet, you can accurately measure objects. Doing so will ensure that the measurements you take are precise and reliable.
Conclusion
The Reading a Tape Measure Worksheet provides a useful and practical way to learn how to read a tape measure. It is an excellent tool for those who are new to using a tape measure or who are looking to brush up on their skills. With its helpful illustrations and step-by-step instructions, this worksheet is an invaluable resource for anyone looking to gain proficiency in reading a tape measure.
[addtoany]
5 photos of the "Reading A Tape Measure Worksheet"
Related posts of "Reading A Tape Measure Worksheet"
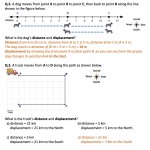
Displacement And Velocity Worksheet
Exploring the Concept of Displacement and Velocity with a WorksheetDisplacement and velocity are two key concepts related to the study of kinematics, which is the branch of classical mechanics that deals with the motion of objects and systems. Displacement is defined as the change in the position of an object from its starting point and...
Declaration Of Independence Worksheet
Analyzing the Significance of the Declaration of Independence: A Step-by-Step Guide with a WorksheetThe Declaration of Independence is one of the most important documents in American history. It declared the United States of America as a free and independent nation and declared the thirteen colonies’ right to revolt against the tyranny of the British government....
Circulatory System Worksheet Pdf
Exploring the Benefits of Utilizing a Circulatory System Worksheet PDF in the ClassroomThe utilization of a circulatory system worksheet PDF in the classroom can be a beneficial aid to teaching and learning. A circulatory system worksheet PDF is an interactive educational material, which can be used to help students explore the body’s complex network of...
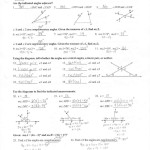
Angle Pair Relationships Worksheet
How to Use an Angle Pair Relationships Worksheet to Master Geometry Mastering geometry can be a daunting task for many students, especially when it comes to understanding and applying angle pair relationships. To help make this process easier, an angle pair relationships worksheet is an invaluable tool. This worksheet provides students with a variety of...